Afterpattern apps can auto-populate any PDF, whether or not it is "fillable."
Upload a PDF to an Afterpattern app to begin making it into a fillable template. To upload a PDF, navigate to the Templates tab in the app builder, then click "Upload" under the PDF section:

As soon as you upload a PDF, you will be brought into the PDF template editor. This is where you will add variables and conditional logic to your new template.
Adding variables to your PDF template is a two-step process:
You can draw several different types of fields onto your PDF. The most common are Text and Checkbox fields:

After you draw a field, you need to assign a variable to it (i.e. what variable do you want to populate this field?). You can assign a variable to a field by either double-clicking on the field itself or clicking on the field once and using the 'Choose a value' dropdown:
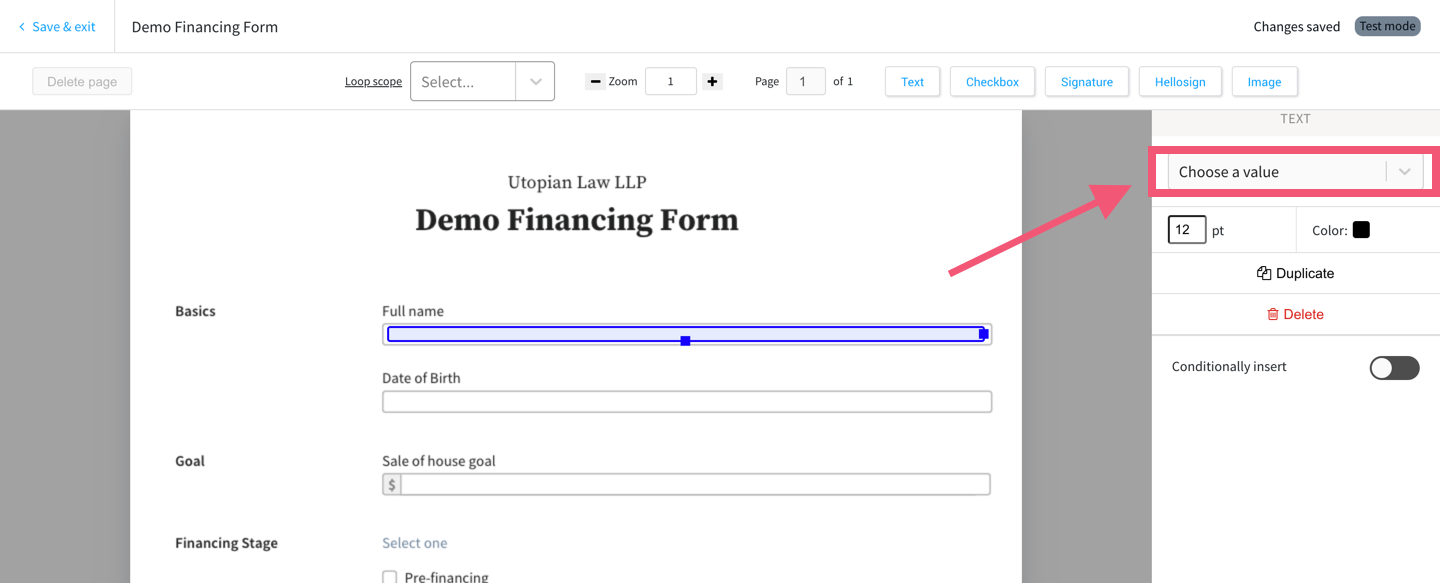
After you insert a variable onto your template, you can click on that variable to add conditional logic to it:

Clicking the 'Conditionally insert' toggle gives you access to an Expression Editor (learn more about creating conditional logic).
What is unique about creating conditional logic on PDF template variables is that you can define what's known as an "else statement": an alternate definition for the variable to be used if the conditional logic expression is not satisfied.
Typically, you will leave the else statement empty, which amounts to telling your app "insert this variable if the following conditional expression is true, else insert nothing."
Manually drawing fields and assigning variables can be a time-consuming process. With some preparation, you can use the 'auto map' feature to speed up this process.
Before you upload your PDF to the App Builder, (1) draw fields on it using a PDF editor (e.g. Adobe Acrobat's "Prepare Form" tool), and (2) give each field a name that is equal to a variable in your App.
For example, here is a field that was drawn with Adobe Acrobat and given a name of client_name:

After you prepare the PDF by drawing fields with variable names, simply upload the PDF to the App Builder. This will automatically map your PDF fields with the associated variable inside your App.
You must determine what to do with the PDF document your template produces, i.e. the final document is not automatically given to the end-user.
Your options are:
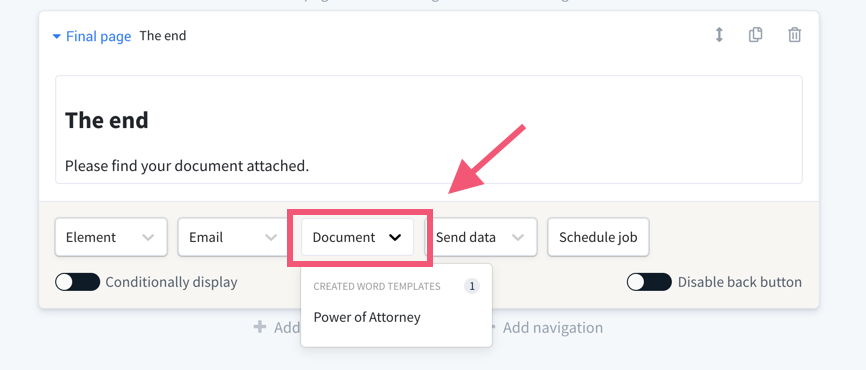
To give the PDF to the end-user to download, you must attach it to a page block. To do this, on your page block, click the "Document" button and select your template:
By default, the PDF you give the end-user is "flattened" (no longer editable), but you can choose to leave it as editable. Learn how.
To email the PDF, either to the end-user and/or a 3rd party, you must first create an email template and then fire that email template from a page block (learn how). Once you've done that, you can include your PDF as an attachment to the email:

To send the PDF to your Afterpattern database, you must first build a database schema with a file-type column. Once you've done that, use a send data function to send your PDF to that file-type column.
By default, after the PDF is auto-populated by your Afterpattern app it is "flattened", meaning it is no longer editable. However, you can choose to leave the PDF as editable.

That's it! Now when the end-user auto-populates this PDF with your app, they will download an editable instead of "flattened" PDF.
This is required for the Afterpattern app to "draw" the fillable fields on your PDF template.
After you recompile the app, you can download a version of your PDF template that includes the fillable fields you drew in Afterpattern:

Then, in a product like Adobe Acrobat, you can view your fillable fields. You may notice that the fillable fields label's are the same name as the variable you assigned in the Afterpattern PDF template editor:


